|
|

To do a blog post from blogger Dashboard page, click on the menu "New Post". Meanwhile, if you want to do a blog post but not from the Dashboard page, then click on the tab "Post" and then click the menu "Create".
Before you do a blog post, there is what I want to explain a little about the work of the tab pages posts divided in two modes, namely mode "Compose"
 and the mode "Edit HTML"
  .
.n my opinion, Compose mode is one of the advantages and convenience provided by blogger.com blog to users who do not understand HTML, in order to be able to write blog posts.
While the Edit Html mode, mostly used by the users blog that understand HTML in order to be able to customize the display contents of the blog post to his taste.
Now, let us get to know some of the menus and functions contained in the work tab page "Post" as a whole.
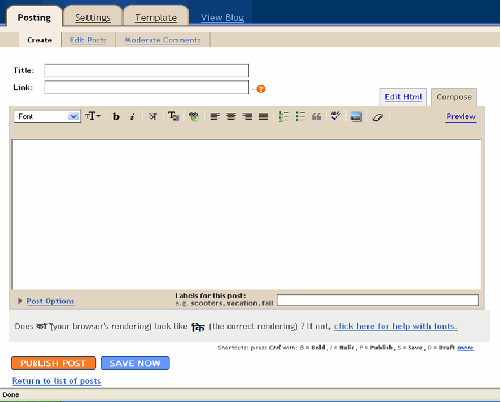
1. Column (Field) Title and Link
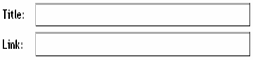 Fill with text or phrase that will be your blog title in the Title field, and if you want in-Hyperlink to a specific URL address of the title, then you can enter the URL address in the Link column, if not then leave it blank column.
2. Formatting Toolbar
 Icon - the icon located on the Formatting Toolbar has the overall function to change the format and style the text or the color of the text, hyperlinks, and so on.
3. Field (column) Font
 Useful to select the fonts you want to use in writing a blog post.
4. Font Size

Useful for small change font or text size on the blog posts.
5. Bold dan Italic
 B Click the icon if you want to thicken the text or can also use Ctrl + b. And i click the icon if you want to italicize your text, can also use Ctrl + i.
7. Write Hindi
 One more thing that most of the bloggers are now writing you can change the type of types of writing Hindi alphabet to writing.
8. Teks Color

Useful to change the font or text color.
9. Link
 You can use the Link tool to create a hyperlink in writing blog posts.
10. Align Teks
 Consists of four tools, which align left, align center, align right, and justify full.
Align Left
 berfungsi untuk meratakan teks pada bagian sebelah kiri.
Align Center
 berfungsi untuk membuat teks tepat berada di tengah halaman posting blog.
Align Right
 berfungsi untuk meratakan teks pada bagian sebelah kanan.
Justify Full
 berfungsi untuk meratakan teks pada bagian sebelah kiri dan kanan.
11. Numbered List
 Used to give the order number on the text you are currently making.
12. Bulleted List
 Used to give the order without numbers on the text you are currently making
13. Blockquote
 Used to create a Blockquote (Text Excerpt) are different from normal paragraph.
14. Check Spelling
 Used to check the spelling writing blog posts.
15. Add Image
 Used to add images or photos on the blog posts.
16. Remove Formatting From Selection
 To move the Formatting Toolbar.
17. Labels for this post

Used to label the blog post that you have written.
18. Post Option
 Option to set the comments from readers, and for backlinks.
19. Post time and date
 Used to change the delivery date of a post that you did.
20. Preview
 To view the interim results of blog posts that you created, click the Preview link.
After creating a blog post, you can instantly publish.
Oh yach, blogger.com now also have a new facility that is Autosave (automatic storage) on every blog post that you created. So you need not worry if ngak sure to save blog posts that you created.
After publishing a post that has been made, then you will see a screen like the image below:
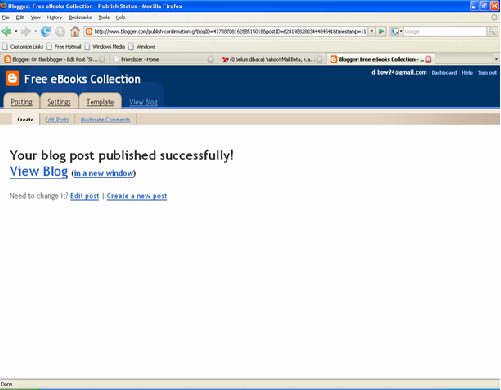
And to see the results of your blog posts, click on the link "View Blog" or can also click the link "in new window".
So, keep blogging :-)
Author: Unknown Location: Pangkalpinang, Bangka Belitung
 Article This is the function and usefulness of existing Button in Blogger, Published by Unknown on the day Tuesday, May 29, 2007. Hopefully this article can add your insights. Unknown a
is a writer who wants to be successful in the virtual world. Try, and keep trying. May God give consent. regards
Article This is the function and usefulness of existing Button in Blogger, Published by Unknown on the day Tuesday, May 29, 2007. Hopefully this article can add your insights. Unknown a
is a writer who wants to be successful in the virtual world. Try, and keep trying. May God give consent. regards


0 comments:
Post a Comment