|
|
 Among the many website that provide free services to create a blog. I like the most is a blog on Blogger.com.
Why?
In addition to free and easy, Blogger templates can be modified in accordance with the wishes. Moreover, today, the new version of Blogger has had additional features such as: new post labels, drag-and-drop template editing, and privacy controls
And for those of you who want to make a blog on Blogger.com, here is a guide:
1. Make E-mail
Before you make a blog (either on Blogger.com, and on other sites). We first have to have an email address as a requirement for registration.
(Do not have email? Click aja here, after that click "Sign Up or Sign")
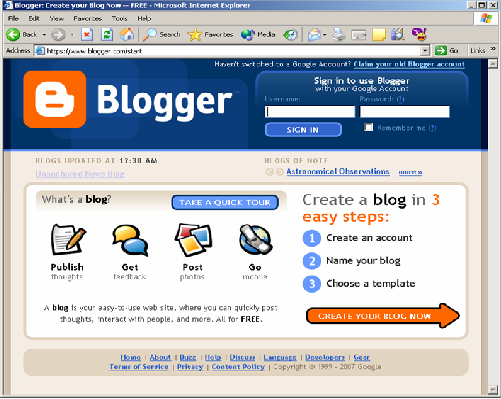
2. Go to Blogger's Homepage
Go to the Blogger address http://www.blogger.com on your browser. then click "Create Your Blog Now"
(The article is in the arrow). Please see in the image below:
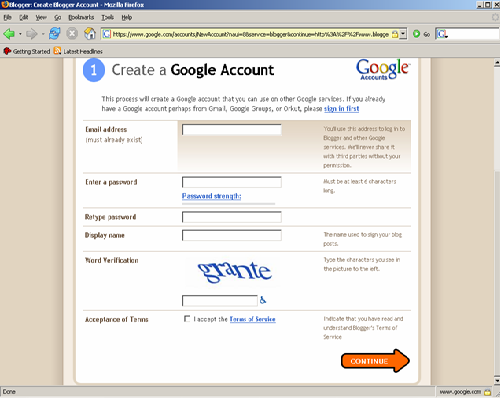
3. Creating a Google Account in the new version of Blogger
This page is used to create a Blogger account that will automatically become a Google Account. So we use that account to log in Bloggers can also be used to log in on all the existing Google facilities.
And if you already have a Google Account, be it Gmail, Google Groups, or Orkut. Then we do not need to register again. You can click on Sign First.
How to register on blogger:
a. Enter your email address in the "Email Address" (the email must be active tablets)
b. Then enter the password in the "Enter a password" and enter the password again earlier in the "Retype password" (password can not be less than 6 characters)
c. Write the name you want to show in the "Display name" (the name will be displayed at the bottom / footer of blog posts)
d. Write down the types of characters in the column "Word verification" (for example in the figure below, the Word verification is "grante", then enter the text that we have is grante)
e. Finally click the small box located to the right of the words "Acceptance of Terms" (stating that we agree with the Terms of service of Blogger).
If you have click "Continue"
try to look at the image below:
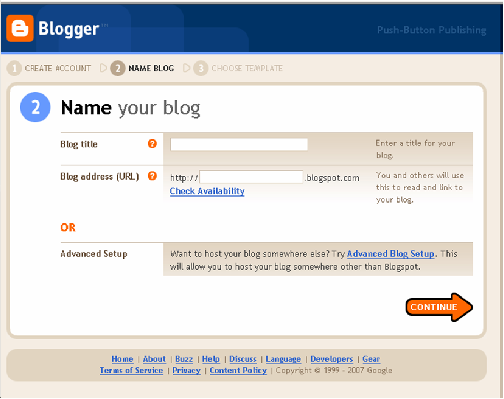
4. Blog named you
On the next page, you will be asked to fill out the form "Name your blog"
Blog title: Filled with Title or titles that we give to our Blog
Blog address (URL): This is a fairly important part because you dimnta to fill the URL address. This is the address that will be used by us or others to view our blog. On this same page, there is a link to perform advanced configuration setup, the "Advanced Blog Setup"
(Note: If the URL address Blogs that we chose is already used then there will be red writing is: "Sorry, this blog address not avaible". If so, then try to replace it with another name.
5. Selecting Blog Template
Choose a blog template that you like on the page "Choose a template". Click on the template you want to make it display your blog later. To see how the look of the blog template, click on "preview template".
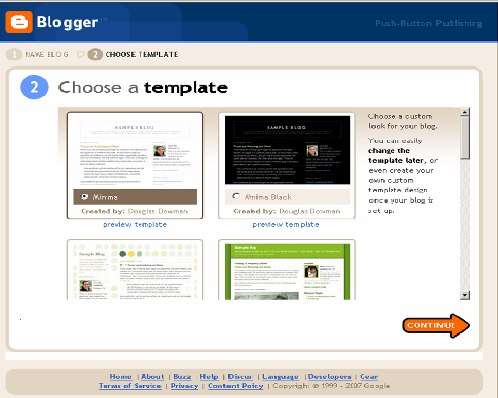
After selecting a template, click on "Continue"
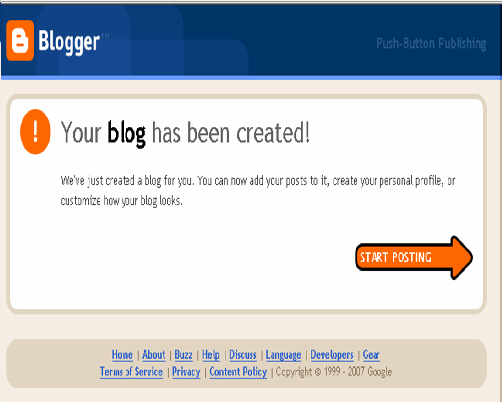
Now, you stay menuggu process of "Creating your Blog", to get a window "Your blog has been created". completed
Furthermore, to begin entering text, click on the "Start posting".
Well now, you already have your own blog and can start to do a post or insert text, images, music, and so on.
How, simple and easy is not it?
Author: Unknown Location: Pangkalpinang, Bangka Belitung
 Article How to Create a Blog Completed peel for the first time, Published by Unknown on the day Sunday, June 30, 2013. Hopefully this article can add your insights. Unknown a
is a writer who wants to be successful in the virtual world. Try, and keep trying. May God give consent. regards
Article How to Create a Blog Completed peel for the first time, Published by Unknown on the day Sunday, June 30, 2013. Hopefully this article can add your insights. Unknown a
is a writer who wants to be successful in the virtual world. Try, and keep trying. May God give consent. regards


0 comments:
Post a Comment